Configuring emsCharts
To enable emsCharts to talk to ZOLL Billing, two areas need to be configured:
- NEMSIS v3 Webservices: Because changes to this table requires special permission, ZOLL will do this part of the configuration on your behalf. Information in this table includes the ZOLL Billing credentials and URL.
- Code tables: Includes the Chart Summary Setup, Transport Disposition Options, and the Custom NEMSIS Setup. Look below for information on how to configure these tables.
Changing the code tables
Important! Before you begin, make sure the service is not extracting and submitting data to another billing service. If it is, STOP! Making changes to the service will disrupt the current process. To proceed, make your changes the day before you want to start sending data to ZOLL Billing.
Chart summary setup
- On the legacy left navigation bar, click Configuration.
- Click the Code Table tab.
- Click the drop-down menu and select Chart Summary Setup.
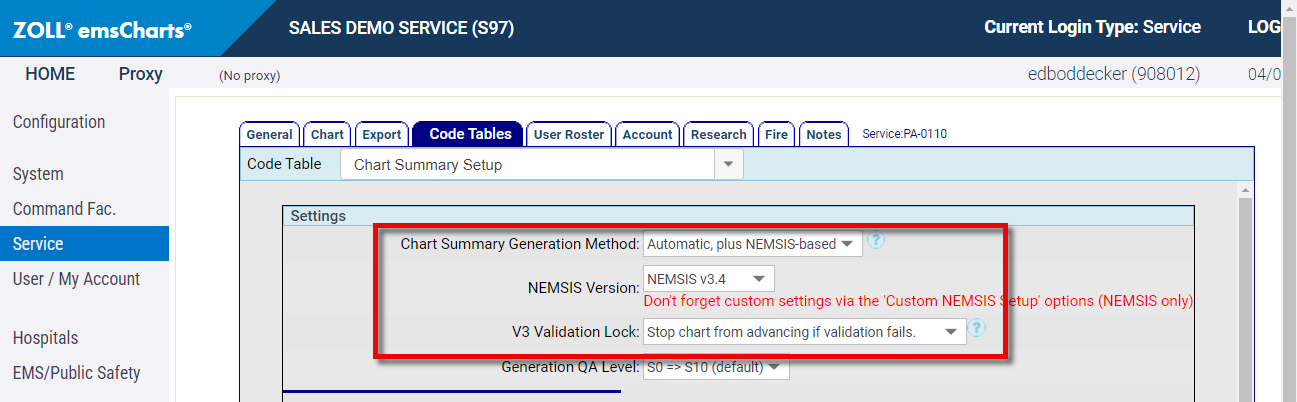
- Change the following fields to:
- Chart Summary Generation Method: Automatic, plus NEMSIS based - allows data to be sent to both the state and ZOLL Billing.
- NEMSIS Version: NEMSIS v3.4.
- V3 Validation Lock: Stop chart from advancing if validation fails - the system will not extract the PCR if it failed the basic validation rules.
-
Save: Scroll down to the bottom of the page and click Save.

Transport Disposition Options table
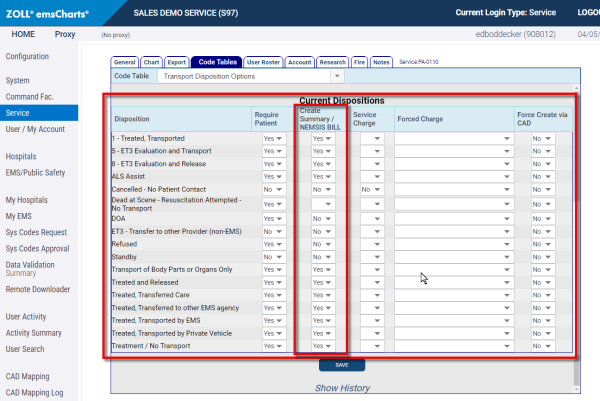
- While in Configuration, click the Code Table field on the top of the page and select the Transport Disposition Options table.
-
In the Current Dispositions section, Create Summary column, ensure that every disposition you want to send to ZOLL Billing has a Yes entry. If not, change it to Yes and then click Save.
Custom NEMSIS Setup table
- While in Configuration, click the Code Table field on the top of the page and select the Custom NEMSIS Setup table.
- NEMSIS v3 Export Chart PDF in eOther: Determines if the PDF is sent with the PCR.
-
NEMSIS v3 Export QA Level: Control the point in the QA process in which the export will occur.
- Click Save.
.png)